NullMind's Lair
Blog of a cranky web-hosting geek !!
RC
-
 Continue Reading: Biz Cards for RC NUT
We have lots of people who ask for contact information for the shop and website, either be at race events or even at the shop,…
-
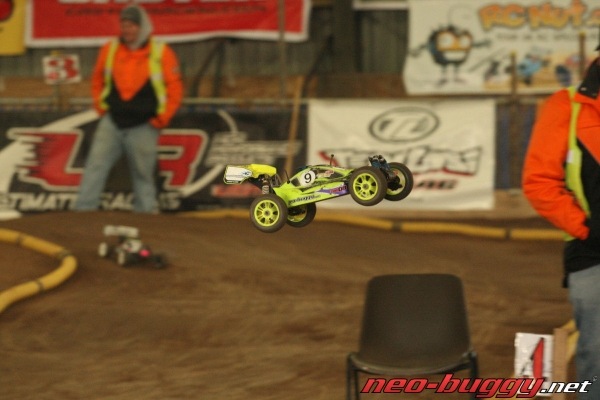 Continue Reading: Yay, finally, a pic of our banners at Neo08 🙂
I was one of the “very small” sponsors at the Neo08 .. we also advertise at the Neo-Buggy site .. so as such I got…
-
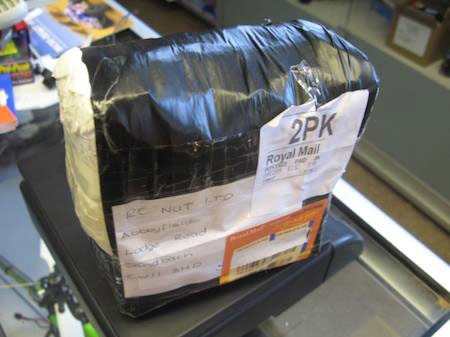
 Continue Reading: Banner for Neo08
Yesterday we received the Banner we will use for the Neo08 race in Harper Adams. RC NUT is a sponsor (a small one), so we…
-
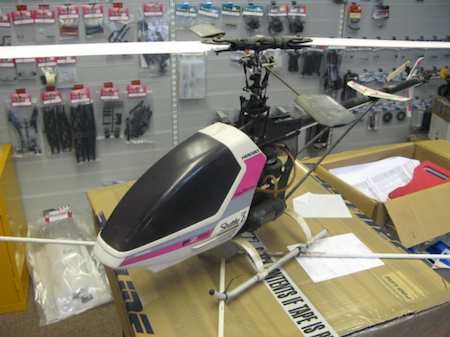 Continue Reading: Hirobo Shuttle Z Trade-In
Last week a customer at RC NUT asked me if I would take this old Helicopter as a trade in for a M.A.S.H. Counter rotating…
-
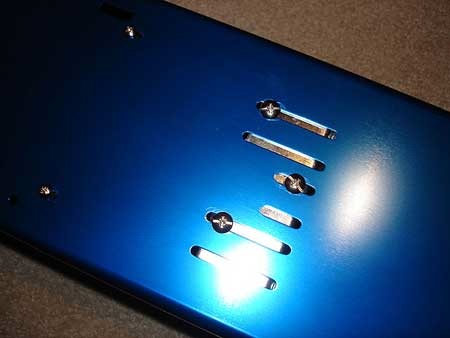 Continue Reading: Losi 8T & SMD Box (OFNA 10244)
On March of last year, Ash from BMM posted a howto on modifying the SMD box to work with the Losi 8IGHT-T Since then, it’s…
-
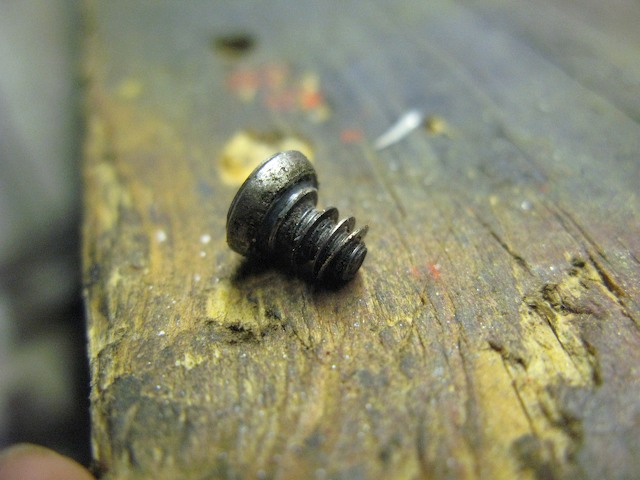
 Continue Reading: Force .32 flywheel problem
I sold a Fioroni Turbo Sliding Clutch to George about 4 – 5 days ago, upon receiving it, he reported that when he mounted it,…
-
 Continue Reading: Hobbyco trip
Today I took a 2 Hour drive to visit The Hobby Co .. the distributors of Tamiya, Italeri, Carson, and a few others, they invited…
-
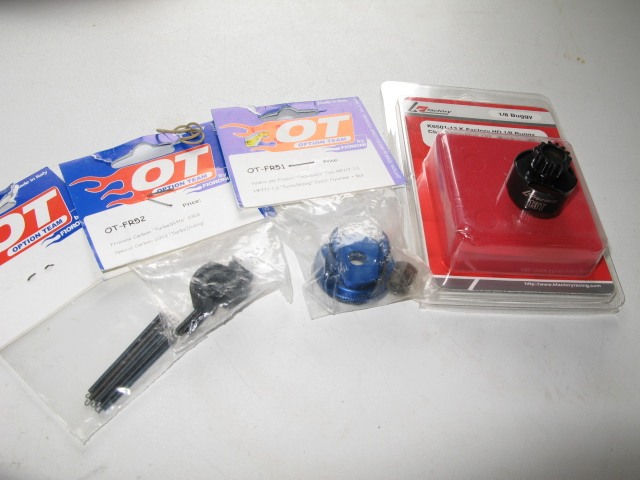
 Continue Reading: Fioroni Update
While cleaning my workbench, I found 3 shims that looked to be the exact size of a shaft … I have no clue where I…
-
 Continue Reading: Fioroni Turbo Sliding Clutch on the 8T
For some reason my 8T keeps on eating bearings, I setup the mesh properly and by the book, but still, it’s a new bearing every…

Lucas Brey
I’m Lucas Brey, a travel blogger sharing practical guides, hidden gems, and honest tips from the road. Follow along for smart itineraries, great food finds, and stories worth bookmarking.
Latest Posts


Categories
Tags
- #photos
- 1/4 scale
- ¼ Scale
- 2026
- 3D
- 45 RPM
- 5D MKII
- 6D
- 8IGHT-T
- 8T
- A340
- A7R
- Abu Dhabi
- açores
- AHT
- amaro
- AMS
- Amsterdam
- Apple
- ARN
- ATH
- Athens
- AUH
- Avatars
- Avengers
- Avi AY Sculpture
- awesome
- Azores
- Baboo Studio
- badalona
- Bane
- Bangkok
- Barcelona
- Basel
- Basel/Mulhouse
- batalhagolfcourse
- Batman
- BCN
- becktonpark
- beertime
- Belfast
- Berg
- BHD
- Bite Me
- BKK
- Black Panther
- Blade
- Blog
- Boat
- bokeh
- Brabus
- Braveheart
- Brexit
- Brick Ln
- brighton
- Broken In
- brotherlylove
- BSL
- BT
- bw
- Camping
- canarywarflondonenglandunitedkingdom
- Canon
- canon17mmtsef4
- canon50mmf095
- capelas
- Captain America
- Car
- Carnaval2026
- Cars
- Cartoons
- cat
- catalunya
- CDN
- CGN
- Check Ins
- churraflex
- churrasco
- cigars
- Cloud
- CloudFest
- CloudFest2023
- Coke
- Cold
- Cologne
- Copenhagen
- Corvette
- Couch
- cPanel
- CPH
- cuba
- Dachshund
- daughter
- DC Comics
- Deadpool
- Deapool
- delgada
- Design
- Desk
- DOH
- Doha
- dover
- doverwhitecliffs
- dramaQueen
- Drive
- drone
- DUB
- Dubai
- dublin
- duck
- DXB
- Earth Hour
- england
- eshisha
- Everaldo
- Family
- Fat Monster Studios
- Fenais da Luz
- fieldrunnerd
- Fioroni
- fishtherapy
- Flickr
- Fog
- Fragger
- Frankenstein
- Fraud
- Fun
- Funny
- Gadgets
- GamingHead
- gamingheads
- garrusvakarian
- Gdansk
- GDN
- Gears of War
- gherkin
- GhostBusters
- Graduation
- greenpower
- GrupoAnjos
- gym
- Half Life
- hideandseek
- Highlander
- Hirobo
- Hoarding
- Home
- Hosting365
- House
- Igloo
- iJaiBreak
- Ikea
- Ikea PAX
- instagramapp
- Internet
- iPad
- iPhone
- iphoneography
- iPhoto
- ireland
- itaste svd
- Jailbreak
- Japan
- Jeep
- johndeere
- Joyetech
- Keta
- kira
- Kuala Lumpur
- Kuala Lumpur International Arpt
- Kuala Lumpur Mala
- KUL
- La Légère
- Landing
- Lasagna
- LCY
- Leeches
- LGW
- LHR
- Liara
- LIS
- lisboa
- Lisbon
- london
- londonbarrier
- Losi
- LP
- lst2
- Lviv
- LWO
- MAC
- MacBook Pro
- Macro
- Magrette
- MAN
- Manchester
- Married
- Marvel
- Mascot
- masseffect
- mavicpro
- MAYA
- mayfair
- memories
- MLST
- Model
- Modo
- MondayBlues
- moon
- Mopar
- MUC
- Munich
- music
- N1 Vision
- Narita
- Nautilus
- NCE
- Neo08
- networkcable
- Nice
- niece
- nikon500mmf4edifp
- Nissan
- NNRC
- NRT
- Numento
- Odessa
- ODS
- OFNA
- Omega
- OnApp
- OPO
- OSL
- Oslo
- OSX
- Ozark Trail
- Parallels
- PDL
- Pele
- Peugeot
- Phone
- Photo
- Piggy Bank
- pizza
- Planet Ocean
- plymouth
- Plymouth Prowler
- ponta
- Ponta Delgada
- Ponta Delgada (Azores)
- Portal
- Porto
- portugal
- Prime 1
- proud
- Prowler
- Purple Fever
- qatar
- RAID
- rant
- RC
- RC NUT
- reebock
- RegoBoys
- Relio
- Renovation
- Robbed
- Robot
- Rock Crawling
- SAAB
- Sabertooth
- saintmargaretsatcliffe
- Sally
- Samantha
- Santa Pod
- Scotland
- Seat
- Sega
- selfie
- Server
- setecidades
- Shannon
- shepilska
- Ship
- Sideshow
- Smart
- SMD
- SNN
- Snow
- snrc
- Sonic
- sonya7r
- spain
- SPAM
- Spawn
- square
- squareformat
- starwars
- Statue
- Statues
- STN
- Stockholm
- Strasbourg
- sunrise
- sunset
- Switzerland/Mulhouse
- SXB
- TallShip Chronicles
- Tattoo
- Team Fortress
- Team Losi
- Tent
- tera
- Tera CP
- tera.cp
- Tetris
- The Darkness
- ThreeA
- tired
- TMNT
- Tokyo
- towerbridge
- Toyota
- train
- Trip
- Tripit
- Trips
- TUN
- Tunis
- Turtles
- TV Series
- Twitpic
- UK2
- ukraine
- unitedkingdom
- Upgrades
- uploaded:by=instagram
- Uwell Crown
- Val
- Valentine
- Vaping
- Video
- VIE
- Vienna
- Vinyl
- Virtuozzo
- voigtlander35mmf12
- VPS
- VPS Cloud
- VPS.NET
- vynil
- Wall-E
- Warsaw
- Watch
- Watches
- WAW
- Weapon_X
- WebHosting
- Weigh Loss
- Weight
- Weight Loss
- Wolverine
- Wordpress
- Work
- World
- World of Warcraft
- WOW
- Xionart
- XM Studios
- xmas
- Z-33
- Zeiss
- zeiss85mmf12
- ZRH
- Zurich