Just another worthless blog
Bit to go here, one of these days
By NullMind on May 8, 2008
A few weeks back I was trying to decide on a new paint scheme for the Summer Series, in the end I went with my regular yellow/red/blue with white accents scheme, just a little different design, this is the sketch I made of it:
Well, I then went ahead and got me a Aztek A470 airbrush, I decided to use my petrol powered air compressor to do the painting, that proved to be the wrong choice, the compressor is great for trackside when I need to remove dirt and stuff from the car, but it does not have a “smooth” air flow for an Airbrush (plus is a bit too powerful, even on the lowest setting) .. so when I was doing some of the detail, it did too much spatter .. thats ok, I’m going to buy a proper airbrush compressor for the next one.
I used masking tape and a custom made stencil for the RC NUT .. this is how it looked after it was all applied
Two weeks later, a few minutes here and there and it’s finally done, I love it, I do wish I had used a pearl white for the RC NUT instead of silver, but in the sun, the silver does whine nice.
It was fun, allot of work, but fun, not too sure on the Faskmask liquid mask I used .. it felt rubbery at times, the Pactra colors on the other hand are beautiful, I backed it all with some Tamiya rattle can silver, just to protect the Pactra paint from Nitro Fuel, I do have some sealant from Pactra, but lets see how this works.
Popularity: 85% [?]
By NullMind on April 23, 2008
About a week ago, I was talking to my rep for Horizon Hobby when the subject of “sponsored” drivers came up, he felt that in lieu of RC NUT growth it was time to have a proper sponsored driver, and they would back us up.
I immediately tough of Sham, he’s an amazing driver at NNRC, and I knew SMD / BMM where already putting some offers to him, so I’d had to act now if I was to have a chance.
Luckily enough, Sham preferred the deal I presented him to the prospect of still having to wait for the CRT X2 to drive, you know what they say, the early bird and all.
So last Saturday, we spend a good 5+ hours rebuilding a brand new Losi 8T for him to race with, we basically tore the roller apart and change oils, settings, as well as some hop-ups, while the 8T is solid from the box, there is always room for a little improvement here and there :).
This coming Sunday is the first time SNRC opens, a nice relaxed atmosphere on a Astro track is just what we need to run the car in for the first time, so Sham and myself will be there for testing and practice .. I hope to have my own 8T rebuild by then so I can take it for a spin as well
I’m very excited, I know Sham is a A-Main contender for the truggy nationals, and that in turn will mean more exposure for RC NUT .. very exciting indeed.
Popularity: 96% [?]
By NullMind on April 21, 2008
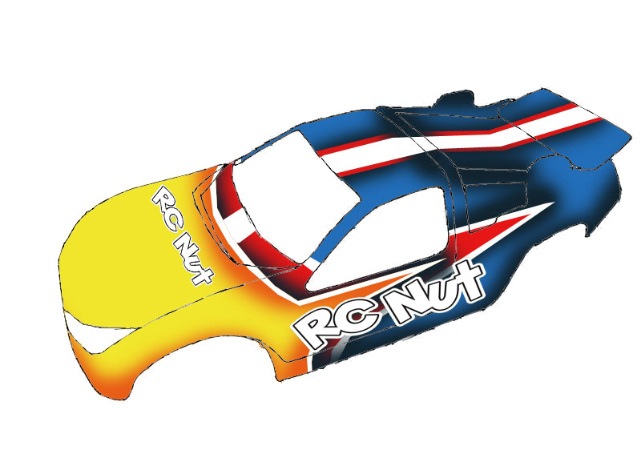
The time has come for a new Shell, and with that, a new paint scheme.
I was debating going with a different color scheme, but decided .. if it aint broke, dont change it, I will use the same colors as last year (Rally Blue, Camel Yellow, Glow Orange, Red & White) .. but on a more vibrant configuration
Basically, same colors .. but different (a little) scheme, I will also be using shading this time to make it have a bigger impact .. so I need an Airbrush :p
Popularity: 85% [?]
By NullMind on April 13, 2008
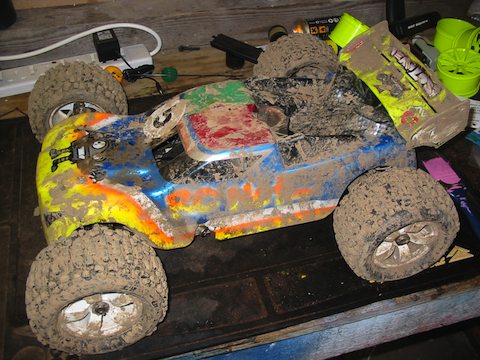
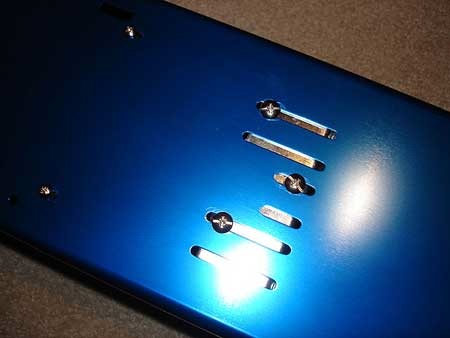
Now that the winter season is off, I figure it was time for a much needed rebuild before the summer season starts, the 8T was still all muddy from the last race at NNRC
Today I basically just started taking it all apart, I will replace all the oils (socks / diffs) as well as new bearings and probably some dogbones will be worn out as well, basically, a rebuild.
I need to order a 8T screw set, as some of the screws are quite worn out as well
Anyway, Day 1.. the tearing down of the beast
More to come in the days to follow …
Popularity: 89% [?]
By NullMind on April 7, 2008
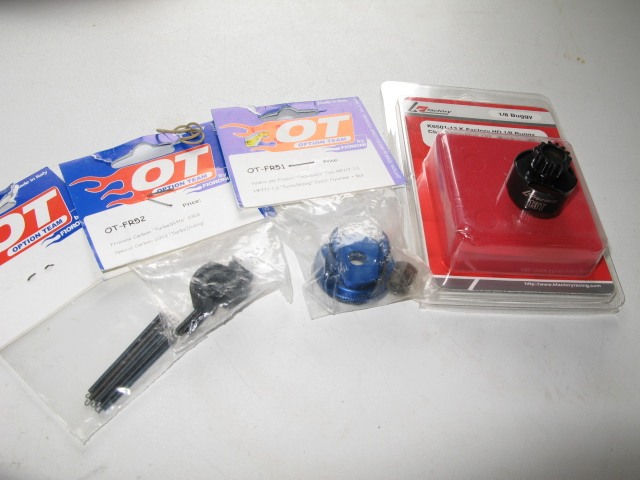
We received a shipment of new Fioroni parts today, and some of them really surprised me
My first pleasant surprise was the new Losi 8/8T engine mount, granted its not cheap, but gosh is it lite .. but my real suprise was when i notice .. it SLIDES !!
The way the screws for the engine mounts work, they have a rail that allows them to slide about 5-6MM .. perfect mesh anyone ?
We also got in the new “Low Innercia” bits (for the 8/8T only at the moment) .. again, they are feather weight .. amazing
We are shipping the first pre-orders of those today, so I should get some feedback on how they perform in the upcoming weeks
Last, some people have asked me the difference between the FR50 and FR51 flywheels .. basically the FR51 is slightly longer, great for the older Kyosho engine and those who need a couple extra MM to reach the spur gear
FR50 on the left, FR51 on the right .. the FR50 is the Standard one and used by most cars.
Popularity: 87% [?]
By NullMind on February 12, 2008
On March of last year, Ash from BMM posted a howto on modifying the SMD box to work with the Losi 8IGHT-T
Since then, it’s been countless times that I have had to dig for it to help somebody on the various forums that ask how to do it, so I decided to just post it on my forum, this way I know how to find it in a Hurry .. this is Ash’s (Ashalak ) guide, not mine.
Firstly you need to remove your motors and starting assembly from underneath the starter box, this is easily done by removing the 3 screws as shown:
Once removed you will note that there is actually a second set of three holes on the underside of the starter motor assembly, you need to re-attach the starter motor assembly with the three alternative three mounting holes. This moves the motor assembly more into the centre line of the starter box which helps align the starter wheel much more accurately with the centrally mounted engine in the 8T.
Next we move on to adjusting the guides, first of all the front guide needs to be positioned all the way down toward the edge of the box, and then tighten up the two screws securing the bracket to the lid:
For the rear guide we need to completely remove it in order to remove some material from the underside, this is best achieved with either a very sharp hobby knife or my personal favourite method - The Dremel! The section which we need to remove is the small plastic lug on the underside of the guide, you need to remove this lug entirely ensuring that you make this area entirely flat in relation to the rest of the guide:
Finally you can re-attach the rear guide onto the starter box lid, however you are only required to mount the inner most securing lug on the underside of the lid. Don’t forget to put the nuts in on the underside of the guide for the mounting pegs as you will be required to remove the guide completely again to do so. With the rear guide secured with only one lug slide the guide all the way back and align the whole in the top guide, with the hole in the rear switch mechanism on the starter box. Rather than having an individual screw for securing the lid to the mounting switch, we need to use a slightly longer screw to mount through the rear hole in the guide and into the hole in the switch mechanism:
The final step is simply adjusting the front and rear mounting pegs on the guides in order to secure the chassis. You are also able to move the complete starter motor assembly forward or backwards in relation to the opening in the chassis, this is easily done be loosening off the three screws shown in the first step and positioning the wheel so that it is central with the flywheel opening. Here is what everything should look like when setup correctly:
Hope this helped!
it sure did ![]()
Popularity: 85% [?]
By NullMind on June 17, 2007
While cleaning my workbench, I found 3 shims that looked to be the exact size of a shaft … I have no clue where I got them :p
So I try it on the CB screw .. and sure enough … it fits !!!

I ended up by only using 2 .. but now it’s PERFECT !!! .. it’s ultra-smooth and no more worries of the CB freezing up
now if I could only remember what those shims are …….
Technorati Tags: 8IGHT-T, 8T, Fioroni, RC
Popularity: 43% [?]
By NullMind on June 17, 2007
For some reason my 8T keeps on eating bearings, I setup the mesh properly and by the book, but still, it’s a new bearing every meeting or two.
Also the CB temperatures go quite high, so I was logging for a vented CB instead.
After allot of reading, I decided to try the Fioroni Turbo sliding clutch .. it just looks so simple and hassle free
Also got a King Headz 8/8T extended motor mount.
So first things first, the CB came undone on the last race, so time to get it out

And a record this time, both bearings are gone, probably when one failed, the CB moved and killed the other one …

I kept the 8T collet, and proceeded to install the flywheel … nothing exciting there, but look how different it looks …

This is how the shoes look, it’s a very simple design, also, extremely easy to install (and quick .. a major plus if one is in a hurry between heats)

I used the 3 springs, so the clutch engages at higher RPM .. which means a faster sprint out of the starting line, I just hope it wont be too much of a push coming out of the corners, but we shall see, it’s uber-easy to remove a spring if I need it anyway

And here it is on the flywheel .. no messing around with clutch tools and funky springs
.. Just slide it in and you done.

The large shim goes here

And last, the vented 13T clutchbell … it looks really nice …

Here I an into some problems … the shaft of the V-Spec is not long enough, so it recesses into the front bearing by a little over 1MM, so every time I tighten the CB screw, the whole CB would frozen .. after asking aroudn fro some help, it was evident I needed a shaft extension, the screw that comes with the 8T clutch does have a recessed washer with a small extension, but it was not enough .. I took the whole thing apart and tighten the flywheel as much as I could, that gave me another 1/2 MM or so, which was enough to make the 8T C B screw/washer work .. but I am not yet 100% happy, I am trying to find a shim that is the same size as the shaft to work as an extender.
And yes, I do have the OFNA Clutch/Nut shim kit .. but the shaft extenders there are too big, it would need allot of shimming and probably hit the fuel thank anyway.
But regardless, it works for now, and sure enough it spins nicely.

Last step was to setup the King Headz engine mount

I did set the engine blocks on the reverse, to push the engine forward 2MM .. that was enough to make this CB line up nicely with the spur gear

And that’s it … now I need to clean the engine (yes, it is dirty .. I know) … and I will test the whole setup next week at SpeedWay RC track …
I am really excited over this setup .. I just love the ease of maintenance, I might also try the teflon/glass shoes (FIO-OT-FR53) if the carbon ones prove too aggressive .. we shall see ..
Technorati Tags: 8IGHT-T, 8T, Fioroni, LST2, RC
Popularity: 61% [?]