Archive of ‘ RC ’
Page 5 of 7« First...«34567»

Setup Station .. WOW

By NullMind on May 8, 2007

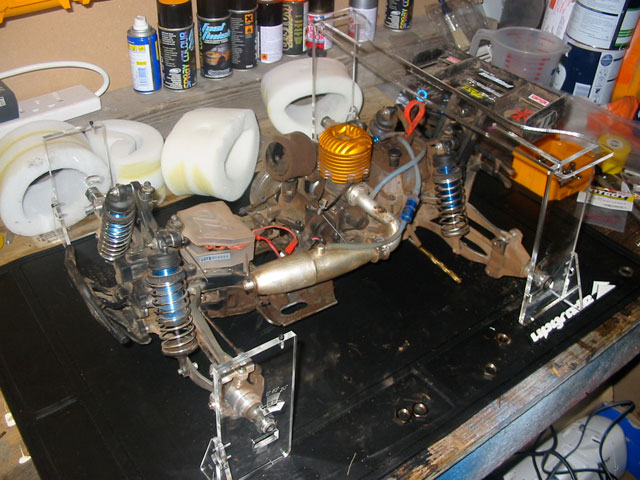
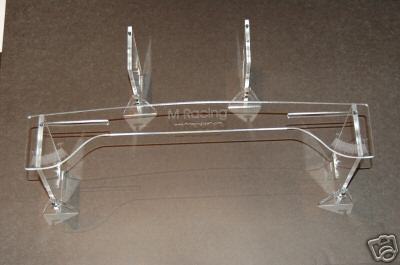
Today I got a M-Racing setup station from lee @ Rapid RC for my 8T truggy

I have never used one before, so I was unsure what to expect .. when I got home I set it up, and after reading the guide at m-racing site ( http://www.rc-setup.com/rc-setup-guide.pdf ) and setting the station up .. all I can say is .. WOW

I fell like I been trying to tighten a Phillips screw with a flathead before .. in a way, this setup station just made me feel like a fool, how I was trying to judge camber by using a ruler .. and never quite getting it right .. this takes guesswork out of the equation and makes such a crappy job (I hated to fix the camber and toe-in/out ) a breeze.

This is how the setup station looks ..

(got this image off an ebay US auction)

 Albums U75 Null-Mind 991A 1-1
I just grabbed a few quick images of my own, the 8T is still dirty from last week’s races .. sorry :p

 Albums U75 Null-Mind Set2

 Albums U75 Null-Mind Set3

 Albums U75 Null-Mind Set4
Now, on these images I have it on top of a Ultimate mat, I would not recommend doing it on top of it, the mat is too soft for it, it needs a nice (and flat) hard surface.

Just a fantastic tool .. I just had to share my view

Technorati Tags: , , ,

Popularity: 21% [?]

sponsor

My Duo (8T & LST2)

By NullMind on May 4, 2007

After allot of work, here they are, both ready for the races this weekend

Img 2684-1

The LST2 of course has been running for a couple of months .. but the 8T will test it’s wheels for the first time next Sunday.

I painted the shells myself, and it’s my own (if basic) design

How do they look ? :D

Technorati Tags: , , ,

Popularity: 16% [?]

sponsor

Nitrotane Fuel

By NullMind on April 30, 2007

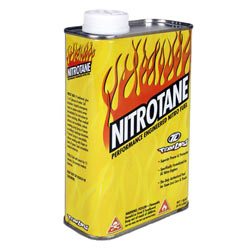
Ok, this is my short experience with Nitrotane so far

Yesterday I ran out of Byron 25%, so some of the lads lend me some O’Donell 25% .. the engine never missed a beat, those two fuels are indeed extremely similar.
Anyway, I had bought some Nitrotane from Lee at Rapid-RC, currently in the UK you only have 20% .. they dont do 25%, but do 30% which will hopefully be available in the UK soon.

 Prodinfo Los 250 Losf0120-250

SO, this morning, I emptied the fuel thank from the leftover O’Donells, and put some Nitrotane in, did not change the glow plug, and did not mess with any of the needles .. fired it up ..

I have NEVER ever, got this kind of performance out of my engine .. the tires who are ribbed & hard foam insert .. all to prevent ballooning, where ballooning like crazy !!! (on the stand), and once again, did not toutch the hight or low speed needles, the weather is also the same as it was yesterday when we tuned it at the track (thanks for the help scott).

And more, usually my truck bogs just a little before it starts running, many times that bog will cause it to actually die down (damo from speedway saw it first hand yesterday at the races when it did, as he was pitting for me and had to run all the way back to my car to get the Losi engine starter) .. no more bog !!, it’s smooth as ever.

This is quality fuel, most ingredients are from VP Racing who is a huge players in the 1:1 Nitro racing in the USA ..

I just cant believe I get better performance from a 20% fuel than I was getting from 25% ??

Of course, this is my early experience, it will take weeks of actual track racing to make sure it is this smooth, and wont fail when under pressure (I’d be suprised if it did) .. but so far, I am truly impressed .. :)

Technorati Tags: , ,

Popularity: 16% [?]

sponsor

New Boots & Mugen Extenders

By NullMind on April 28, 2007

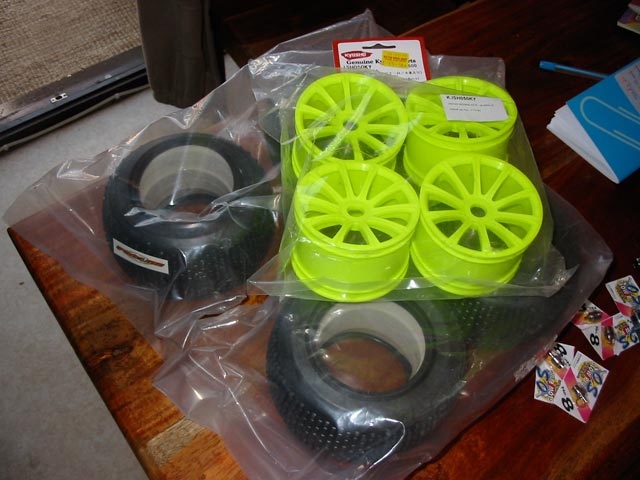
After realizing my LST2 was just a little too wide, I decided to trim it down a bit by going with 0″ offset wheels & Mugen hex extenders, this will trim the truck by 1″ on the width (I been using full 1″ offset wheels)

Anyway, I also wanted some nice looking wheels, so I decided on some Kyosho spokes

My order arrived today from BMM, here is the wheels & tires as they arrived
W1
And a little while later and a few glued fingers, they where neatly setup and ready for install

W2

One of my favorite tools of lately is this flywheel wrench (by Dragon Racing ?), that one the opposite side has a 17mm wrench, due to the hole in it, I can safely hang the hexes while removing the grub screw inside .. also great to tightening the hexes/screw
W3
I started by setting up the Mugen extenders, there are actually standard on the MBX5T, they fit perfectly, I put 2 washers behind it just to make it a little tighter .. but other than, they fitted better than the 8IGHT 17mm hexes.
W4
After I setup the first wheel, I took this picture from above, it’s easy to see the 1/2″+ difference, while still maintaining the clearance to the Arms (yes, the truck WAS filthy, I cleaned it after I was done with the setup :( ).
W5
Another picture of the wheel, those Kyosho wheels look superb on the Boe Ties .. I am loving the look
W7
Just for kicks, I took a picture of the old wheels (who are a full 1″ offset) on the extended Mugen hex .. it makes the truck as wide as a city block .. amazing
W8
And that was it .. easiest upgrade ever, I was also quite surprise to how lite the Mugen hexes are.

And here it is a complete picture of the beast, all set for tomorrow, we are visiting another club in Preston, hopefully I wont be the worst driver there as well :) W9

Technorati Tags: ,

Popularity: 18% [?]

sponsor

Nomadio Sensor

By NullMind on April 23, 2007

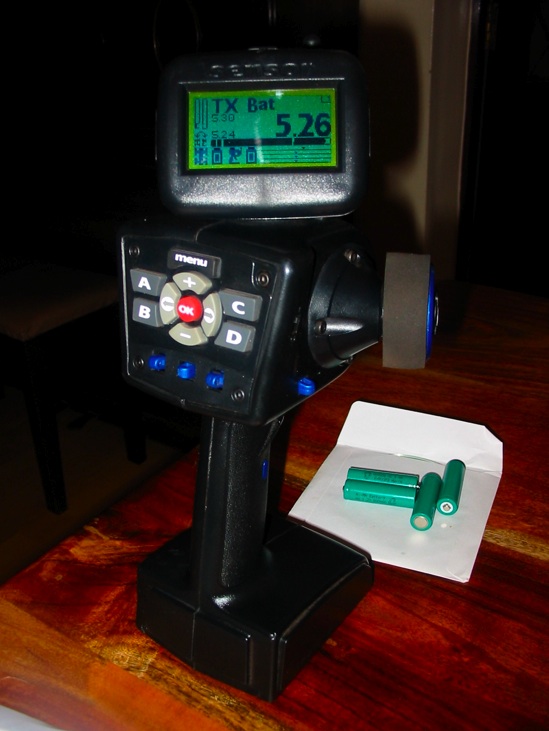
Last Friday I finally got my Nomadio Sensor I ordered from Killer Hobbies in the US

Even so I paid £54 in duty fee’s, it was still £100 cheaper than buying it in the UK .. :(
Picture 1

Anyway, I was all excited when I plugged it to my only Windows machine (My old Fujitsu 10″ laptop), only to be disappointed by the fact it would not work, no matter what I try, the Nomadio desktop software would not communicate with the Transmitter.

After some emails to Nomadio support and a phone call, they recommended I sent it back .. they did offer to pay all shipping fee’s, but for me was the disappointment of not having it for at least another 2-3 weeks.

But I was not yet defeated, I knew the Fujitsu has some weird hardware, so I asked my next door neighbor to let me test it on his desktop PC, and sure enough it worked !!!

I took it to the track Sunday, and simply put, it was the best I ever driven the LST2 .. The Nomadio is incredibly responsive and sensitive, I can feel the truck much better, which in return, means I have better control over it and better driving overall.

But today came the Ugly part, I still need a PC to manage the desktop software (yes, you can do all the settings via the nomadio’s screen, but it’s so much nicer and cleaner to use the PC software instead), so I decided to install Bootcamp and XP on my MAC !!

The XP install on the MAC went flawlessly .. looking at the XP screen on my MacBook Pro felt weird .. almost sacrilegious :D
I then setup the Nomadio Desktop software, plugged in the USB to the TX .. and presto .. it worked :)
I still have sooooooo much to learn on this radio, there are options for everything .. even ABS brakes ??

So I suspect i’ll have lots of fun in the upcoming weeks learning about all it’s features, as well as setting up the telemetry .. so far, it looks like money well spent.

Picture 2

On a quickie, I put the 8T logo on the startup screen .. later on i’ll do a more detailed one :)

Technorati Tags: , ,

Popularity: 17% [?]

sponsor

Titanium Build is done ..

By NullMind on April 8, 2007

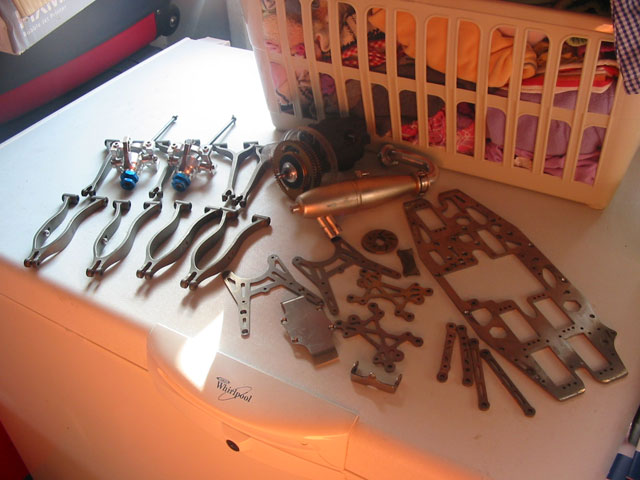
Well, it’s 1:00 AM on Sunday .. and after working for 5-6 Hours on the LST2 non-stop, I can finally rest .. the truck is ready for tomorrow’s .. err, I mean Today’s racing.

The screw extractor I ordered did not arrive, so I went on a mission to find one, after a futile visit to B&Q and Focus, I finally found an extractor set at Halfords

Img 2606-1
So, with this screw off, I could finally proceed with the cleaning and setup of the front arms.

Everything was going well, and once I was done with an Arm set, i took this picture
Img 2612
I am sure LST owners will be able to identify right away what is wrong, needless to say, when i realized it, I was bummed out, it meant removing those dreaded e-clips again and all the shingles (who are a PITA to setup)

So after allot of cursing and more work, it was finally done the right way
Img 2614
Everything else went smooth, earlier I had dipped the servos in plasti-dip, to protect them from water .. I was expecting them to be tight to setup this time, but they went in just fine, the Losi servo’s are quite smaller than the HITEC.

And here it is, it feels very lite, and I cant wait to take it on the track
Img 2617
A picture of it with the shell on:
Img 2618
Those OFNA 1″ offset wheels just make it look incredibly wide, I am really anxious to see how it will behave, later today I’ll post an update on how it went :)

Technorati Tags: ,

Popularity: 16% [?]

sponsor

Titanium Rebuild II

By NullMind on April 6, 2007

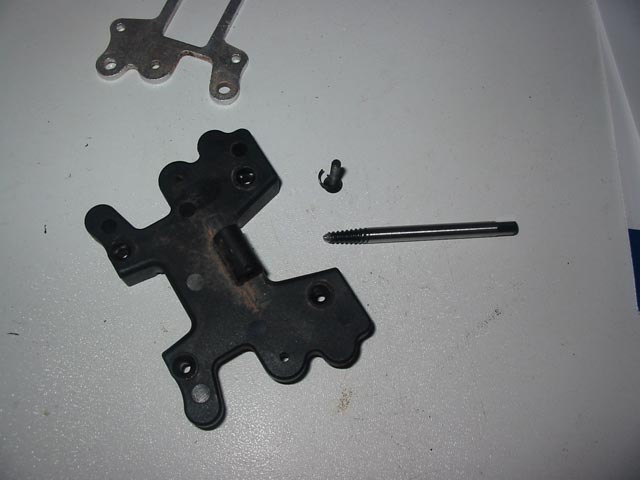
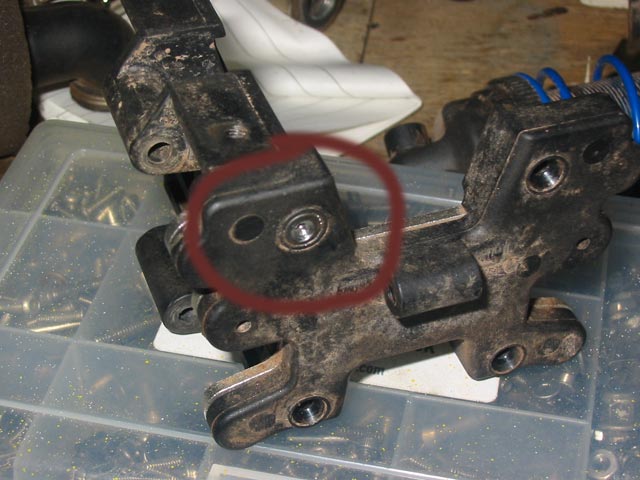
Well, nothing very exciting today on the build .. I have a stripped screw on the front assembly, so I am not able to clean and put the front arms together .. unfortunately I did not had a extractor, and the local hardware shop did not had one either, so I ordered one online, it will be here tomorrow morning so I can continue the work .. cutting it short for the Sunday races, but I am sure i’ll make it :)
Img 2598
I try to drill into it and was going to just remove the head, but from what I see, I then wont be left with enough exposed body to use pliers to remove it, so instead of messing it up more, I decided to just wait for the extractor.

So I decided to assemble the FOC, brakes, Spurs & Engine
Img 2595-1
After I was done, I plug in the fuel line and fired up the engine, the RD Logics dual stinger pipe just sounds insane !!!! .. I cant wait to try it out on the track.

One of the things I absolutely love are those TiNi spur gears .. they look sharp.

Well, still allot to be done tomorrow, but if I extract that screw in the morning I will have it all done and ready to roll by nightfall .. glad it’s a Saturday :)

Technorati Tags: , , , ,

Popularity: 17% [?]

sponsor

My Titanium Rebuild

By NullMind on April 5, 2007

Just last week, i was commenting to my wife at how happy I was with my LST2, and how finally it was running perfectly .. and since I do not like aluminum parts, there was nothing else I wanted to add to it .. so as far as the LST2 was concerned … I was done ..

Right …

I did not like aluminum parts, mainly because my recent experience with a Integy aluminum roll bar, which bent the first time the truck flipped over .. but I was never told about Titanium !!

So a few days back I was browsing the “for sale” forums at Maxbashing, when I see for sale Titanium parts for the LST2 .. now I know titanium is strong as hell, and light as an alloy can be, so I threw the “I am done” comment to the wind and started buying ..

One thing led to another and by the time I was done, I had almost as many new parts enough to build another truck

Here is a picture of most of the parts that I got, most of them “pre-loved” at an amazing discount.

Img 2577
In a nutshell:

- Flextech titanium arms set
- HCR Titanium chassis
- HCR Titanium F/R Upper Tower Brace x2
- HCR Titanium F/R Bulkhead Brace x2
- HCR Titanium Upper Hingepin Brace x2
- HCR Titanium Lower Hingepin Brace x2
- HCR Titanium Battery Skid
- New Era silver steering knuckles
- New Era silver C hubs
- RD Logics twin stinger exhaust & manifold
- Dynamite engine brace (not pictured)
- Losi hard anodized engine (not pictured)
- TiNI spur gears
- Crazy nut racing brake discs
- Gearbox with Forward only conversion
- Losi hard anodized front, centre and rear skid plates (not pictured)
- Bad Ass creations V2 Steering link (not pictured)

So, with only 3 days left before the next racing day, i got to work ..

I dismantled the LST2 .. and what a mess I was left with, I never split apart the LST2 like this, so I am hoping I remember how to put it all together :D
Img 2582
Believe it or not, in that picture there is a LST2 and a 8T on the bench … somewhere

I started with the main Ti chassis plate, and before I knew it, I was on my way to a good start, I must say, Losi did a great job on this truck, by making the front and the back virtually identical, and using the 2 tier plate system, it’s just so easy to work on it.

Img 2585
All titanium at this point, I was amazed at how light this material is, next is a picture of the underside, with the Dynamite engine brace and the Ti battery cover.

Img 2586
Before long, I had most of the back setup, I put the Flextec Ti arms on, and man, do they look great, once again, amazingly light

Img 2588
Since the Flextec arms are designed for the LST C hubs, I had to do some major shimming, I was going to order the RPM adaptors to use the RPM arms with the LST2, but the shims seems to do just as good of a job.

Img 2590
It is shim galore ;) .. I had to use 12 shims per arm, 6 on each side.

So once that was done, I also setup the new wing mount that I got to replace the one I broken :p … and so far, this is how it looks

Img 2592
Tomorrow I’ll move to setup the front arms and perhaps i’ll have time to setup the transmission as well ..

Looking good so far …

Technorati Tags: , , , , ,

Popularity: 18% [?]

sponsor

OS .21 V-Spec Engine

By NullMind on April 4, 2007

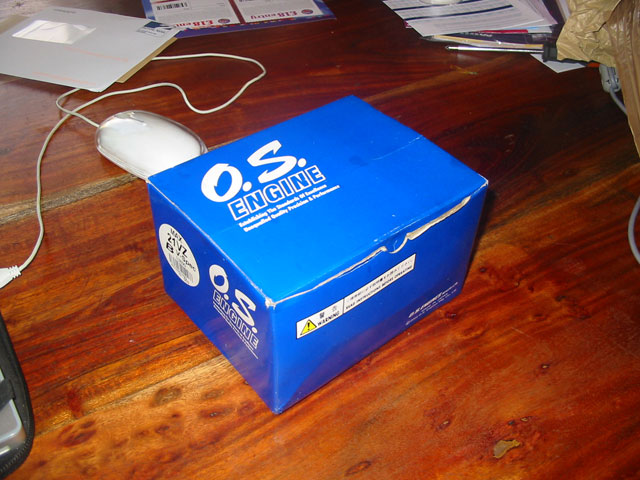
My OS .21 VZ-B V-Spec arrived today, as well as the P3 Turbo glow plugs it requires

I cant wait to have the 8T fitted with it and running .. just waiting on pipe and starter box :) Os2 Os1

Technorati Tags: , , ,

Popularity: 17% [?]

sponsor

Tire Soup ..

By NullMind on April 3, 2007

Today I received a set of OFNA offset wheels that I purchased last week online

My idea was to replace the Proline, non-offset ones that I am using right now with these, so the LST2 stands wider and the front tires dont rub in the arms when on a tight turn.

So I knew I had to remove the tires from the current wheels, and from research online, I found out the best way was to .. err .. boil them

Boiling the tire subjects the super-glue which binds the tire and wheel to intense heat, which then makes the glue regress to a liquid state, at this point it looses it’s glue properties and the tire can be safely remove .. easy no ?

Well, the problem with internet advise and pictures is, they dont give you a sense of SMELL .. and these things stunk while boiling .. my wife was certainly not impressed .. and to think I read somewhere you can also bake them .. but the smell is even worst .. ouch

Here is a picture of the tire on the pot, since it floats, and you must remove the glue from both sides, I had to boil them for 15 minutes and flip the wheel for another 15 minutes on the other side, later I tried with less time, and by the 4th tire I found out that 7 minutes each side was enough to liquify the glue.

Off5-1
add some potatoes and it’s yummy
Here is the tire once removed from the wheel

Off4

The new HUGE offset wheels
Img 2566 Img 2567

And a show with the new wheel on the left, and the one I’m replacing on the right .. amazing how much wider the truck will be .. will make it for sure very stable during racing.
Off1

Yep … I’m loosing the plot :D

Technorati Tags: , , ,

Popularity: 16% [?]

sponsor
Page 5 of 7« First...«34567»